
Comments welcomed and encouraged Okay, I know, I know... you've probably heard all about these things in the past. Or you've watched any number of videos by photogs with their favourite things that they use every day and suggest that you need them too.
My list is the same, but different. Every item in my list gets used each and every time I shoot, whether in studio or on location. Some get used when photographing people and when shooting table-top or other still-life items. They are just that important. I'll post the details here and let you decide what appeals to you. Hopefully you get some value here, and maybe, just maybe, your life will be 1 to 3% more rewarding because of it. Okay, so here goes. 1 Clamps Clamps come in many different sizes and strengths. I use two sizes, one about 3 inches and the other about 6. They are invaluable for holding cards, fabric, cables, props and sometimes even clothing in position. I use them to hold up my background cloth on to a horizontal pole. I use them to position tiny reflectors on tables for shooting product. I even use one to hold a dark card over my monitor to keep glare off of the screen from the ceiling light. It's pretty ghetto, but much cheaper than a store-bought version. $8 vs $200. 2 Gels Specifically, lighting gels that are mounted on lights in order to change the light colour or quantity. They come in a myriad of different colours, and strength of colours. I bought a small pack that fits in a pocket, to mount on my speedlights this year. Amazing move on my part as it gives me more opportunity for creative results. I also have large sheets that I can mount on larger lights or even cut down with scissors to fit specific lights more precisely. If I want to control light without changing the colour, I can use neutral density filtering gels, or polarizing gels on the lights. The former reduces light reaching the subject, while the latter polarizes the light to help remove reflections from shiny surfaces. Specifically oil paintings. Used in conjunction with a circular polarizer on my lens, I have much needed control when photographing artwork. I would highly recommend learning about gels and grab a set for your lights, at least to experiment with. 3. Stands I have 5 stands that I use both here in studio, and while out in the big wild world. Since I only use speedlights currently, my stands are mostly light-weight stands that reach to about 6-7 feet. I will use the stands to hold lights as I said, and a background kit in addition to holding cards or reflectors. My biggest stand, which I grabbed this year, is a heavy-duty and fairly hefty beast that has a tilting extension arm. This give me the versatility to be able to put light up and over my subject when the need arises. This year I bought it to enable me to use a large softbox over top of motorcycles for a personal project I am involved with. I was lucky to be able to source this stand from an importer and saved almost 50% off of retail. The deals are out there if you take the time to look. 4. Gaffer Tape When you see the credits at the end of a movie, you may notice a job title that is "Gaffer". It's this person who is responsible for controlling a large amount of the grip equipment for the lights etc. They always have rolls and rolls of gaffer tape on their belts and in their vehicles. This tape is strong, sticky and really imperative for holding things when a clamp will not be suitable. The great part is that it doesn't leave a residue when being removed. It comes in different roll sizes and widths. I would suggest wrapping a few inches on your tripod leg just to have it available. It's great for controlling cables, positioning small objects on tables (mirrors, reflectors) and all sorts of other uses. The large rolls go for about $25 and will last at least a few years. Black is the standard as it doesn't reflect light, but blue and red come in handy too. 5. White and black card On more than one occasion I have had to use a 18x24" white card (foamcore) to bounce light into my scene as it gave a more flattering light than a straight flash. I even used this technique for the cover of a magazine shoot a while ago. Black cards are ideal for controlling light that is bouncing into your scene as they absorb light. They also can be great for blocking light from striking your lens and ruining the shot. In this case they are called a "flag". I've also used cards to change the light by cutting random pockets or shapes in then and shining light through them in order to give variety to my background when a dull background needed spicing up. So remember this, white cards bounce light and black ones block it. You can find them at Dollar stores, some office supply stores and they are really inexpensive. Buy a bunch. BONUS 6. Reflectors Reflectors do exactly as the name implies. They reflect light. These can be something simple such as a small white piece of paper, or a folding commercially made reflector that zips up into a pouch. In fact your hand can be a reflector, as can a white shirt or a small hand mirror. Ideally, a reflector is exactly what works for the job at hand. Small objects sometimes need tiny mirrors to achieve the goal, large objects, such as cars, obviously need large reflectors in order to bounce light in a useful way. Different colour of reflectors will give you different results. A purple reflector will produce a purple result on your subject. It's a fact that light takes on the colour of the object it hit. That's basically how we can perceive colour. If you wanted to show that a white egg is actually green, and you didn't have a green lighting gel, grab a green reflective card from the dollar store and shine a daylight balanced light on it. It will bounce onto the egg as a green light. You're welcome. These simple items are always getting used in my work. If you find value in this little bit of info, please consider sharing with your crew. Knowledge is power. Comments are closed.
|
Mike Taylor
Photo-Artist working a personal vision. Archives
April 2024
Categories
All
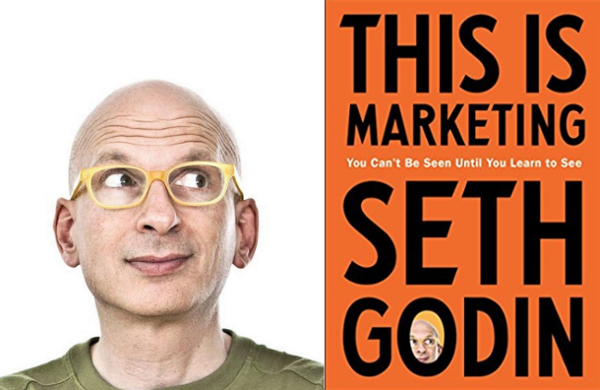
For those of us interested in better marketing techniques, get this book.
Mike Taylor Photo Arts
205Wilson Street
Peterborough
ON
K9J 1S7
Canada
|
 RSS Feed
