
|
Admittedly, I am not a stickler for perfect colour when it comes to my own personal work, but when I am taking on a commision that's another matter altogether.
There are one or two things that really bother me when I see a photograph of a scene or product, and knowing that the colour is off is certainly one of those 2. It doesn't happen too often but when it does, I cringe. I've even taken to downloading the culprit image and working on it in software to see how much I can correct it. Given that it is always a low-resolution jpeg file, the results are usually rather crap but it's satisfying to know that my estimation is generally very close to exact. What's worse is when I see images by "professional" photographers, usually portrait shots that the shooter is using to market their services with. My glob, what were they thinking? It's criminal. Just criminal. A couple of years ago I was lucky to have had the opportunity to document the paintings of a local artist. Such projects are heavily dependent on the ability to record perfect colour. These images are used for sales material, submissions to competitions and galleries etc. If I were to screw up the colour, it would have been disastrous for the artist and most surely would have put a big stain on my reputation. There are techniques and tools to ensure good colour that every photographer should be aware of. In my case, I come from a studio skills education background. I learned how to print in colour as well, having been trained by a life-long photographer Rafael Goldchain (look him up). I can't say that printing is an enjoyable process, but it did instill in me the desire to "get it right" . One of the key tools I employ is a colour chart that holds industry standard colour chips. Xrite colour checker in the passport size. It goes to me on every shoot (almost). In the studio I'll pop it into the scene either before I start shooting the subject or at the end before I tear down. Notably, If I have to change lights mid-shoot, I'll shoot an additional colour checker to make sure I have all the information I need for success. Secondly, in order to work on the images on my equipment, it is paramount that my monitors are calibrated regularly for accurate colour. I do this process at least every month and certainly before I work on a job for a client. This way there can be no doubt in my mind that the images I deliver are colour accurate each and every time. I use the iStudio system from Xrite to do this. Plugging it into the system and following the instructions makes for a pleasant task that even I can do in little time. Looking for that signature style of work is one of those, long drawn out processes that never seems to be far from my mind.
Taking the hint from a choice few successful photographers, and artists (including musicians) I've been on the path of signature creation for the past few years. I'm truly not sure if I have settled for any one style of shooting, but I am recently recognizing work that I know is NOT what I would like to call my style. Most of it is typical of that shown on Instagram and similar public forums. After a while (and a few hundred images) they all kind of look like they came from the same source. There's just not anything "unique" about them. Sometimes I find myself stopping in the middle of a shoot once I realize that the image on the screen looks not unlike everything on the Instagram feeds. It screams copycat and I instantly put a halt to the process. The last thing I want to create is something bland and without merit. The status quo deserves zero attention. The purple cow deserves all my attention. Whenever I grab a new bottle I am interested only in creating more of that elusive purple cow goodness. If I'm only making images that allow me to "fit in", I'm inevitably making no progress. Don't know what I mean by "purple cow"? Take a few minutes to search for the book by Seth Godin, called "Purple Cow". If you want to make any headway as a creator, entrepreneur, business owner etc, go grab a copy. You'll be thanking me later. Anyway, searching for style is another way of saying that I'm always hoping to create that purple cow. The work that stands apart, and deserves comments and attention. Work that is remarkable. Work that is worthy of making a remark about. It's this sort of art that spreads amongst a choice audience. I am not trying to appeal to a big audience. That, after all would be a fool's errand and would lead to going absolutely no place. Making art for the smallest viable market would be the smartest action for me and for you, if you are intent on gaining the attention of a certain market. As I go through this process, it seems that with each image I create, I am getting closer to the type of work that speaks to me and is a strong representation of my "style". The work that is worthy of remark. Today it is a bottle of scotch whisky. Tomorrow it might be some rum or a cold glass of beer. The niche is obvious but the style is still a challenge. Cheers I recently took the time to photograph a Canadian bottle of apple cider here in The Tiny Studio Peterborough. Glad I did. Afterwards, I popped it in the fridge and allowed it to cool to a decent temp. The next day at lunch, out it came. Coupled properly with a turkey wrap and a salad, this cool and crisp cider from No Boats On Sunday was an excellent drink. I was able to finish the entire bottle, without feeling dragged down as alcohol is known to affect me. The alcohol by volume is a respectable level, so I was completely clear to drive and could get back to work without consequences. Light and delish, is how I would describe it. It is without a doubt my favourite cider now. Not as sweet as some, not as boozy as others. Okay, back to work.   Wine photography, beer and all that sort of product photography is a never-ending process of dealing with reflections. With that a photographer is also constantly controlling shadows, shapes, colours and more in the process of building a photograph.
Personally I enjoy having the control of all these elements. 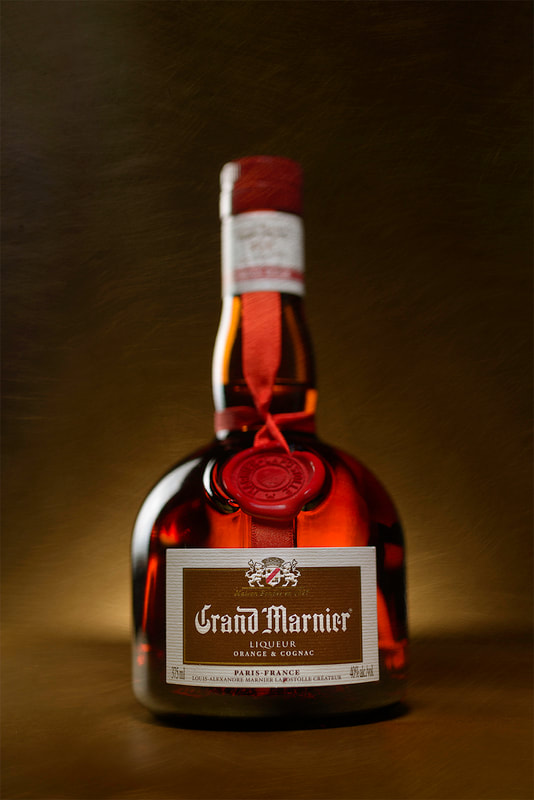 Making changes in your life is, I think, an important and never-ending process as we grow and experience "life".
What I have decided to undertake this year constitutes a substantial change in my career as a photographer, and probably as a person. Over the year I will be endeavouring to go back to my roots as a studio product photographer and build my skills in the realm of drinks photography. I will be concentrating on this niche as a way to differentiate myself from the masses, as well as give me the ability to do work that I can produce without the limitations of mobility, space and social restrictions. It occurs to me that way back in college, I had aspirations to be a "food photographer" upon graduation. Well, that didn't quite pan out as expected and I found myself doing odd jobs as well as assisting an interiors photographer for a number of years. Coming full circle, I find myself needing to reorganize in order to make myself relevant. In the immortal words of Seth Godin, I hope to create a "purple cow". If I remain in my current situation, I am going to remain virtually invisible. Not good if one wants to eat. An image (or other media) each week is my goal. I want to post something that gets attention and keeps my name in front of interested eyeballs. So far, I've been achieving that milestone. Along the way I've been learning and re-learning more about lighting reflective surfaces, stop-motion animation, retouching and post-production skills and more. Whomever said that "photography is easy, anybody can do it just grab your mobile", needs a serious slap in the head. This is nothing but a skillful profession that is not for the weak of heart or spirit. Watch for more work from me in the realm of drinks photography, as I phase out of portraits over the year. Stay safe. Cheers M 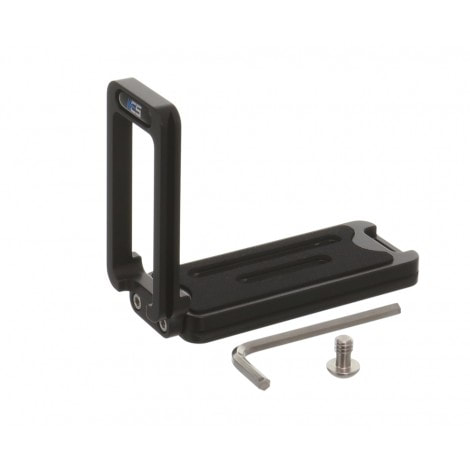 Tripods, are an item that I use for perhaps 80% of my projects.
Why? Stability and sharpness. Especially when I'm shooting outdoors or table-top projects. To say that these are important issues as a photographer goes without saying. I have a tripod that is big, heavy(ish) and versatile. This things is a beast of a machine that is designed to carry the weight of a large format film camera. In fact I used the same model in college when I shot 90% of my assignments on an Arca-Swiss 4x5 view camera. It had to be stable. These days I have sold off my 4x5 camera and solely use 35mm DSLR equipment. That isn't to say that I no longer need strong equipment. Not in the least. Stability is still a priority. Hence the point of this post. For years I was traditionalist when it came to camera gear. I went with the flow and did what others were doing. And then I discovered that amazing creation, the ball-head. Well certainly changed the way I used my camera and tripod combination. Not only did I have flexibility but speed as well. I love(d) it. I would never go back to the original head with it's extra weight and clumsiness of use. When I bought that ball-head I had already heard about this cool accessory. The "L" bracket. So research I did make. And knowledge I did acquire. Within an hour of time I was sold. It just made sense. Why had I not bit the bullet and made the purchase years ago, I don't know. But now I did. The point of the "L" bracket is two fold; 1)keep the camera lens in the same position when changing from horizontal to a vertical orientation, and 2)to maintain a stable working environment. These are game changers in many types of photography. Now, there are added bonuses of being able to create simple panoramic images and cutting down on weight etc. But the primary points of interest for me and many others are the 2 points clarified earlier. I've had it mounted on my camera for the past 3 months, so getting out in the field and really putting it to work is the next order of day. I'm completely convinced that I made a wise decision. If you are a tripod shooter, I highly advise you to do the same. My version is from Kirk Enterprise Solutions in the USA. I paid about $100 with shipping. Well worth the small investment. There are a number of custom builds to suite any camera out there, as well as a universal version (which I bought) to cover any that may no longer be in production. Again, if you shooting on a tripod, go grab your wallet and find one of these gems. Your shooting with improve, your joy of photography will be maintained. You will thank me later. Have fun. Keep shooting. 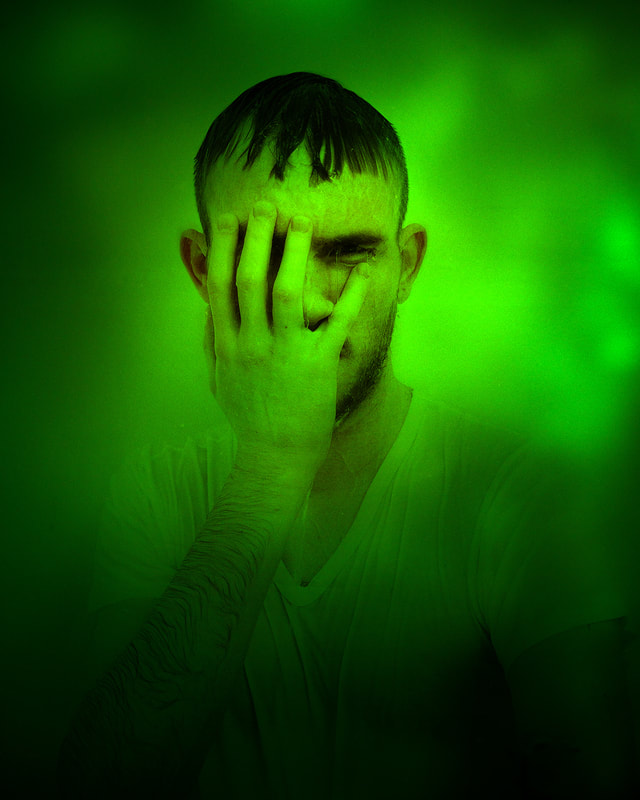 Dramatic by definition, "sudden and striking" amongst other terminology pretty well tells you how an image should affect the viewer of the image.
It should make them react, stop and think, consider the image and what it means to them. But how do we accomplish this? Certainly the subject matter is an important component. As is the lighting, and to a point the colour or lack of it. I also propose that expression and costume (if present) plays a part. Now let's take it a bit further and talk about the post-production part of the image making process. When I am planning a portrait session, I tend to pre visualize the end result and assemble my shoot based on my end goal. Granted, it doesn't always end up that way, but I know that it is a smart idea for me to have something to strive for even if I end up veering left or right and arriving at a completely different point. Post production includes all the work done after the original image exposure. When I have the image back in my computer, I undertake a series of tasks that will get me closer and closer to my end goal. Some of these steps include the adjustment of tones and colour overall, as well as adjustments to smaller areas of the image. This could be a quick process or could take an hour or longer. It all depends on how I feel about what I am looking at and what I am trying to achieve. It also could involve the addition of layers of subject matter that takes the image to a different level. By this I mean that I may add a blend of textures, colours, shapes etc in order to move the image closer to the dramatic look I want. The image above for example (provided by a photographer on Unsplash.com), started out as a fairly simple portrait against a white background. Upon considering the character of the person, with his water soaked body and stressful body position, I felt that it was indeed a portrait expressing stress or distress. From this I felt that a colour change was inline with my goal. Adding a layer of green, that I had shot earlier as well as the blur made this a much more impactful image. If you can imagine the portrait as a simple shot, against a clean white wall, I'm sure you will agree that the image before you truly expresses the idea of stress. Making dramatic portraits should be a process that starts well before the shoot begins and doesn't wrap up until well into post production. Using layers of textures that you shoot yourself (keep a library of textures) will give you a breadth of options. Shooting for the drama can add a whole new range to your portfolio of offerings and in your art work as well. This year I took the plunge. I signed up for a year subscription to Adobe Photoshop CC and Lightroom Classic. It gives me the confidence to work away at an image without the program crashing or tripping through a project. Sure, it costs money. But constantly arguing with the software costs time and frustration. Especially when you forget to save a project just before the system crashes. One of the new features of Photoshop is it's upgraded Select Subject tool where a user can almost magically make a delicate and detailed selection with practically just one button click. Amazing time saver. If you are under the clock to get a project completed, this could very well make your day go much better. Something else I enjoy with Photoshop CC are the new tools and options in Content Aware Fill and the Sharpening. Such an obvious improvement from CS5 and CS6 versions. Hats off to Adobe for keeping the software growing and improving from one version to the next. It's true what they say. You could work with this software constantly day in and day out and still not experience every tool and process to its maximum potential. This year I am going headlong into blending layers with portraits in order to create unique pieces. Some of the images involved up to a dozen texture layers on top of the original image. Whatever I want to throw at Adobe Photoshop, it handles with flair and finesse. How are you making waves with your work in Photoshop? Feel free to comment. 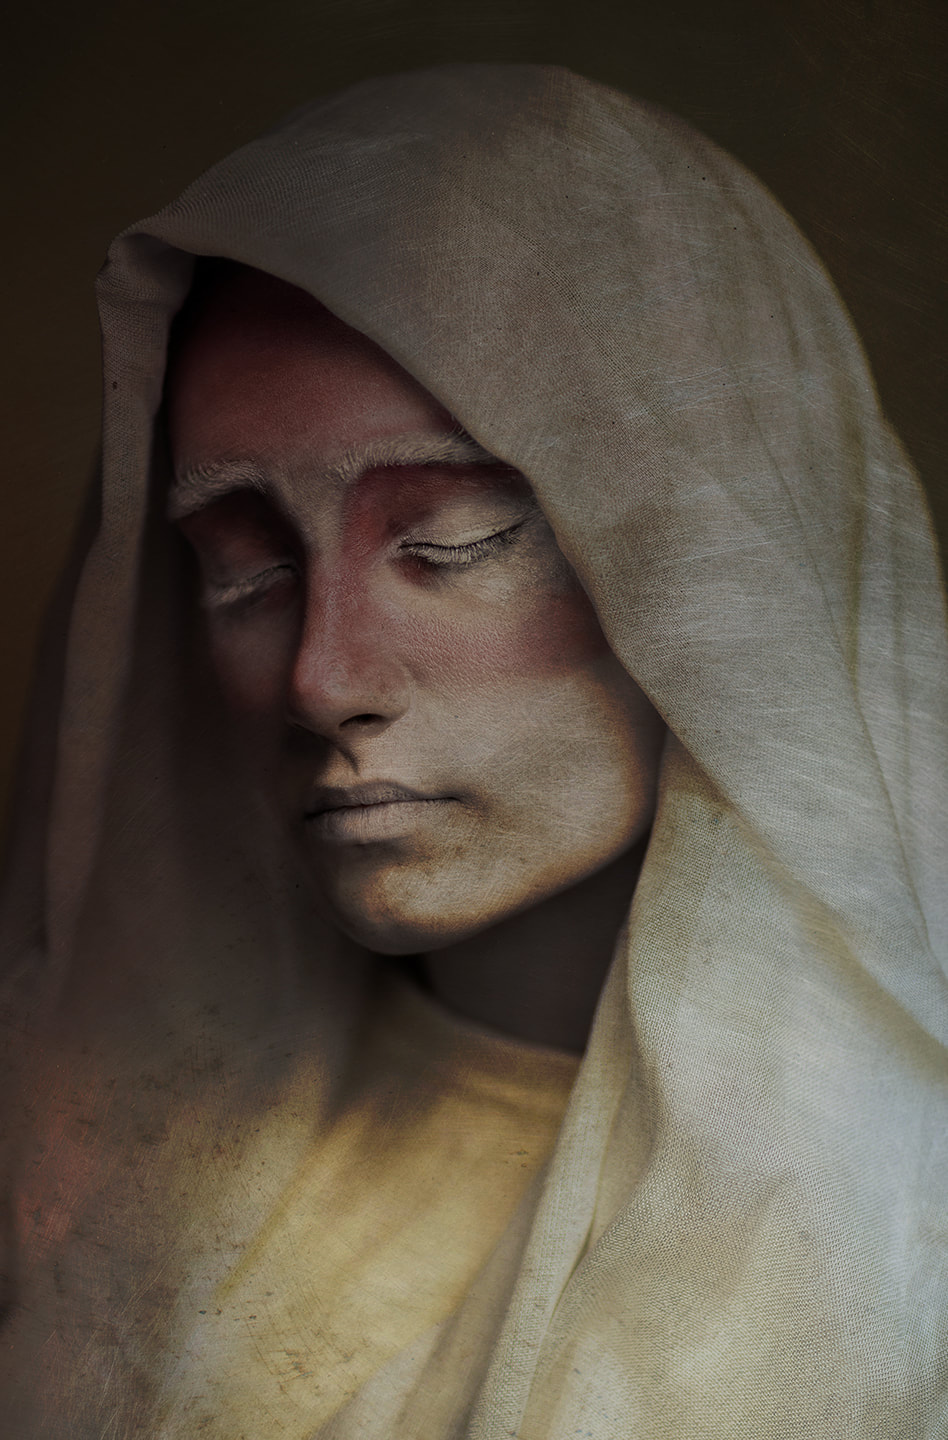 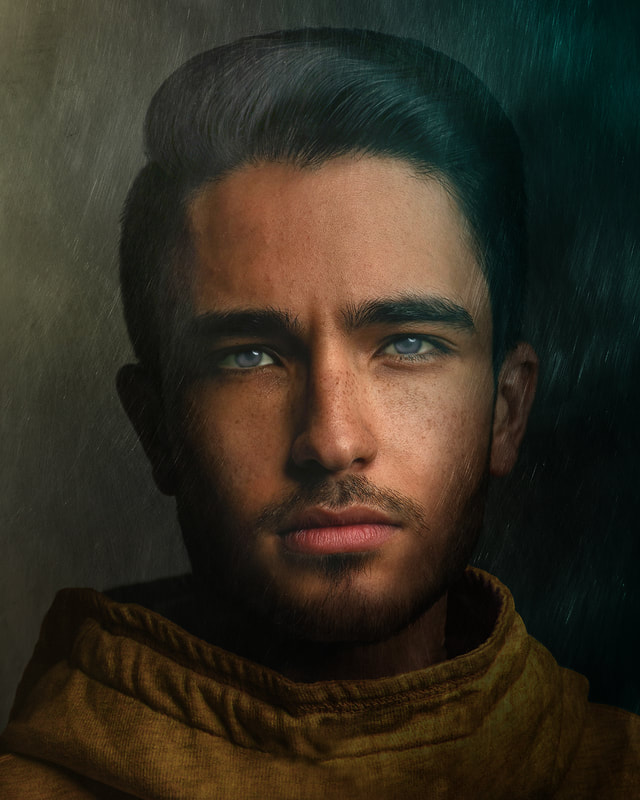 How do you know when a picture is done?
This can be a tough question to answer. I've asked that of artists who paint on canvas, as well as photographers working in the digital darkroom. I don't think that there is a universally accepted answer to this question. Personally, I tend to stop before I get frustrated with an image. If it gets to that point, then I will typically clear all my adjustments, take a break and come back at it fresh and new. Working an image until I get angry or cranky tends to result in lacklustre results. However there is something to be said for taking the time to experiment. To find a number of ways of doing things that just don't work for that specific subject matter. I'm told that Edison tried over 3000 designs before settling on a satisfactory lightbulb. It's okay to try. That's exactly how we learn what doesn't work. My work in portraiture tends to be subtle. Adding a bit of texture, altering colours and tones, bringing up the shadows or perhaps making them more intense as the project requires. I love shooting portraits of people. But they're not truly complete until I have worked them in retouching software. My personal touch includes the lighting, pose and of course the retouching or as I like to call it, the treatment. The treatment stage typically is 30 minutes in length, but I have been known to stretch it out to a few hours when I just can't decide which path to take the image down. In times like these, I may even scrub the work and start over completely from the basic image. There are no hard and fast rules. I just do what feels right and what I feel the image calls for. Many of the images are layered with custom shot backgrounds and textures that I shoot over the winter months. I also will walk the city in search of background materials such as rusty surfaces, scratched metal walls, rocks, clouds and who knows what else. There are thousands of potential options for random textures available. A road trip to the nearest big city would allow me to add even more textures. A great way to spend a day in the city. Post production as a way to make a portrait into a signature piece is important to get attention for your work. It's with this extra effort that your work will stand alone in a sea of copycat "photographers". I intend to continue growing as an artist with my personal approach to portraiture. My post-shoot treatments will help me to gain that growth. I hope that you will also find techniques that work for you in your quest to stand apart from everybody else with a camera. |
Mike Taylor
Photo-Artist working a personal vision. Archives
April 2024
Categories
All
For those of us interested in better marketing techniques, get this book.
Mike Taylor Photo Arts
205Wilson Street
Peterborough
ON
K9J 1S7
Canada
|

 RSS Feed
