
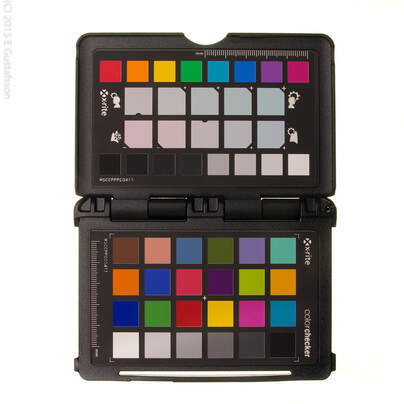
Show your product as it really is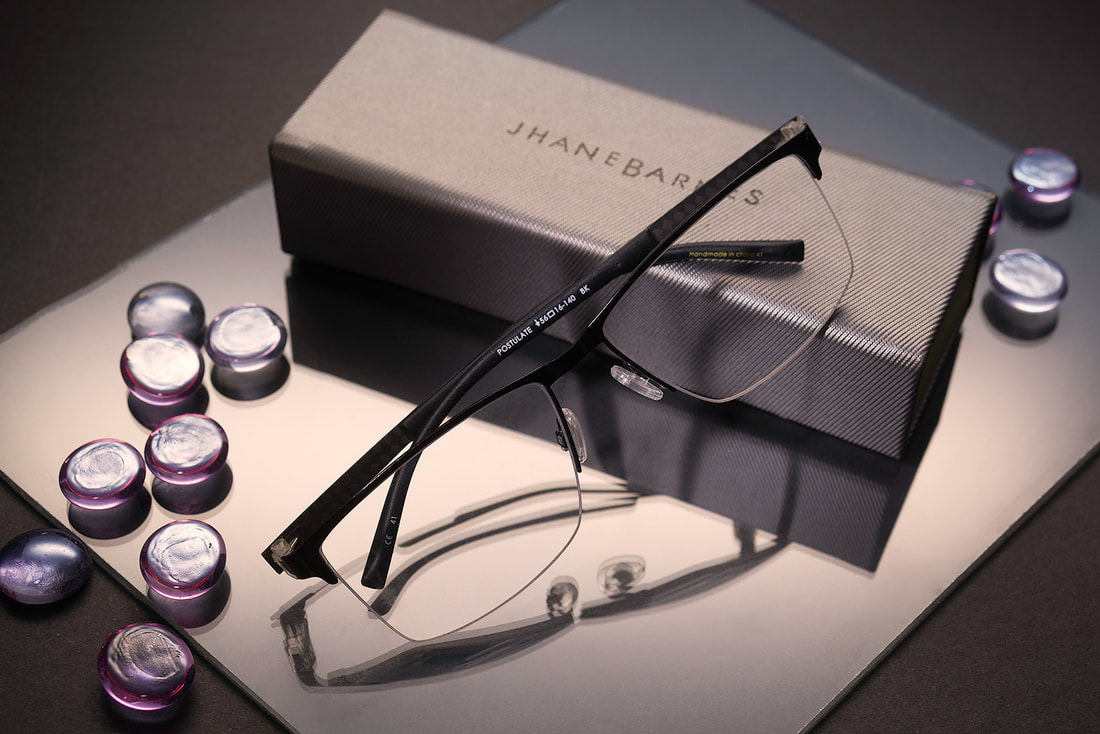  photo: Shawn Harquail photo: Shawn Harquail While sales catalogues have all gone online, that's both good and bad. Good, because you can reach people who in the past would never have heard of your product or known you exist because they hadn't received your printed catalogue. Bad, because you can not be held responsible for the quality of the image they are looking at once online. The problem here is that each monitor or screen a person views your product on, may display your product as being a different colour or hue. This could backfire when the client puts the product in their hands. We unfortunately can't control that, but what we can control is the production of the images at the outset. Here is how you can do that. Lighting The first important control is how we light our product. Since light has a different colour depending on the type, and to a point, the age of the light source, using the best lighting is essential for a successful product photography setup. Shooting products that are rich in colour and texture requires lighting that is daylight balanced at about 5500 degrees Kelvin. These are available as simple LED bulbs which are then diffused through a white paper, silk, bedsheet (pure white) or photography umbrella. Avoid trying to bypass this accuracy by using a cloudy day, because as the sun moves across the sky and indeed as the seasons change, the colour of the light changes. This in effect changes the colour of the product you are photographing. What we are going for is a consistent lighting arrangement. I would suggest purchasing a 3 to 4 foot long LED box light and mounting it to a light stand or a pair of LED lights in circular reflectors mounted to a stand. [see resources below] This will give you a portable lighting solution that is predictable and easy to use at a moment's notice. Situate your lighting so that it is about 5 feet from your subject and 45 degrees from it. [see diagram] What we are going for is a soft light to spread over the subject, not a high-contrast beam aimed directly at it. A large source of light (in relation to the subject) is the perfect solution. However, trial and error are advised because of all the variables at play in any given situation. Once you find the setup that makes your product look great consistently, record the positions and settings. Background Keeping the viewer's attention on the product is essential. What you put your product on or in front of plays a big part. Ideally, a white background, such as a large sheet of white paper, a pure white wall or something similar is what we want. Rolls of white seamless paper can be bought from photography suppliers. [see resources below] In order to achieve consistency here, you may need to light the background separately. Alternatively, if you have a powerful enough light setup, you may not need to. To avoid harsh shadows on the background, do not place the product directly against it. Experimenting with distances starting at about 3 feet is a good idea. If you have a white wall, start there. If you are selling wedding gowns for example, look for a complimentary background. Coloured seamless paper is readily available too. Camera Setting your camera up on a sturdy tripod may be necessary to allow for longer exposure times if you are using LED lights. It's not as crucial if you are using flash. Ideally, you will have a camera lens that has an adjustable view angle. Something around 50mm is great. Any wider than that and you risk distorting the product. If you are shooting with LED bulbs, your exposure time will likely be around ½ second. This is why the tripod is required. At first, set your ISO to a low number. Let's say between 100 and 400 ISO. The white balance should be around 5500 degrees, or daylight. Aperture around f6.3 to f8. Don't use a wide aperture (f1.4 to f4) if you can avoid it because it will limit your depth of field (focus) to a minimum and that may make your product appear out of focus. Avoid a tiny aperture, (around f22) as this will require much longer exposure times and risk colour shifts and blurred images. Assuming that you are shooting for the web, have your camera's image quality set at jpg/jpeg, and "fine". This will provide high enough quality, but moderately sized files. What we are going for are files that look great on a monitor of almost any size when enlarged, and load quickly. Some people are guilty of uploading images that look great at 2 inches tall, but look horribly pixelated enlarged. Not good for sales. The diagram below gives you an idea of a good starting point for locating your product in front of the appropriate background, and the lighting in relation to it. In this case, the "diffusion" is a white piece of fabric (pure white), but it can also be a bed sheet or a photography umbrella. Keep in mind that light takes on the colour of whatever surface it hits or passes through. 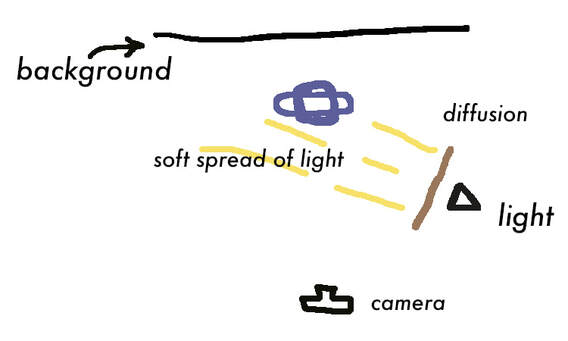
Wrap up
With this information, and some practice, you can accurately create images of your products quickly and with good lighting and colour. People who visit your site will be assured that what they put in their hands is exactly what they previewed. Please contact me if you have any further questions or suggestions. Resources For those of us in the Peterborough area, you can find a great selection of daylight balanced LED lighting at Jenco, on George street across from Del Crary park. A huge variety of photography equipment can be sourced from Henrys in Oshawa/Toronto, or Vistek in Toronto or Ottawa. A great portable white background solution is by Westcott. |
Mike Taylor
Photo-Artist working a personal vision. Archives
July 2024
Categories
All

For those of us interested in better marketing techniques, get this book.
Mike Taylor Photo Arts
205Wilson Street
Peterborough
ON
K9J 1S7
Canada
|
 RSS Feed
