|
This article illustrates 4 key points for why you should be using a Wacom tablet in your photography work. * Improved workflow * More precise adjustments * Faster processing of images * More ergonomic interface, reduction of mouse-related problems Improved workflow Any photographer interested in keeping their processes moving along in an efficient manner, should be considering adopting the use of a Wacom or other branded tablet as their primary user interface. Having the ability to fully customize a wide variety of features to each and every application, not just Photoshop or Lightroom, gives the user so much more ability to get the job done quickly and with less stress. Sure there is a learning curve with this new equipment, but that is the case with every new camera body, flash, computer etc. Once the user has decided on the most effective settings and gone through them a few times, they will be wondering why they hadn’t switched much earlier. Having used a mouse and keyboard since the dawn of time, I was amazed at how much faster I can go through a batch of images with a tablet and stylus. I can accomplish complex tasks faster and more precisely. This means I make fewer mistakes. Mistakes that necessitate me undoing my work and having to start over. On a side note, even if I am working in a different sort of software that has nothing to do with image manipulation, I still find myself picking up the stylus instead of the mouse. It’s just that much more agreeable to my frame of mind. It makes want to use it. More precise adjustments Having the ability to adjust not only things such as brush sizes on the fly but also, brush pressures, angles, tonalities and so much more is such a blessing. I personally, find that these adjustments are now so quick that I rarely use the keyboard except for those times when I need to enter information. With two buttons on the stylus that can be programmed to take on a number of responsibilities in addition to the plethora of settings on the tablet buttons and radial menu, the ability to precisely affect the images becomes a pleasure and not an annoying task. When I used the mouse I found that I needed to move the mouse in a way that seemed rather clumsy. Metaphorically, it’s almost like reverting to using candles to heat a room instead of pressing a button on the thermostat. Having learned to write with a pencil at an early age, like most people, using the stylus/tablet combination is like picking up that pencil again. It’s familiar, comfortable, ultimately usable. The fine control available when using the Wacom with its stylus will make you more of an artist than a technician. Faster processing of images From start to finish the fact that the user can work in a more intuitive manner alone speeds up the processing. Instead of an operation requiring 3 or 5 steps, it may only require 1 step. This means that things like resizing images for export, copying and creating multiple layer copies etc. can be done in a third of the time that it used to. Used in conjunction with the Actions feature in Photoshop, for example, a user can get things done so much quicker than in the past. We are truly living in an amazing time, to quote photographer Joel Grimes. There are countless videos online that give you instruction on how to speed up your workflow using a tablet. I would recommend that any new user look for a few videos, but ultimately you won't become used to the tools unless you practice using them. More ergonomic interface, reduction of mouse-related problems Using a pen-like interface for most people is a more intuitive approach to working with files. Yes, using a mouse has become the “norm” for computer interfacing over the last 30 years or so, and touch screen technology is quickly overtaking, but there is something rather artist-like when one uses a precise tool such as a well-balanced stylus and tablet to do the job. Holding the stylus as you would a fine pen, with access to the programmable buttons, you feel well connected to the image on the monitor. The hand can move freely. The wrist is not fixed in a position that invites discomfort with repeated use. Repetitive strain injuries are also significantly reduced. This combined with the variety of available stylus tips, and surfaces for the Wacom product line, you are able to truly work like an artist would on paper or other media. A Danish study of some 3500 Danish workers revealed that using a mouse in their daily work, increased their chances of pain and strain by a factor of 4, even if they only used the mouse for half of the computer time. Another study, again by Danish scientists, revealed that workers using a mouse in their jobs for more than 30 hours per week had up to 8 times greater chance of developing forearm pain, and double the risk of neck pain. Shoulder pain also increased significantly as a result of continued usage. The Wacom line of tablets, for example come in a variety of iterations. There are the basic versions for a relatively small investment all the way up to the Cintiq line designed for production studios that will set you back a pretty penny. Available through camera shops, online at various suppliers and of course there is the used equipment market of which I'm a huge fan. Whichever way you go, it's best to do a lot of research beforehand. I would not recommend purchasing equipment that is designed for travel if you are never going to do location work, nor would I suggest buying a large tablet if you have a tiny work desk. Look at your situation and your style of work then find out what is available to fit your needs and budget. Ranging from around $90 to well over $2400, there is a tablet that will work for you. That's it for me, the next step is yours. Okay, I know, I know... you've probably heard all about these things in the past. Or you've watched any number of videos by photogs with their favourite things that they use every day and suggest that you need them too.
My list is the same, but different. Every item in my list gets used each and every time I shoot, whether in studio or on location. Some get used when photographing people and when shooting table-top or other still-life items. They are just that important. I'll post the details here and let you decide what appeals to you. Hopefully you get some value here, and maybe, just maybe, your life will be 1 to 3% more rewarding because of it. Okay, so here goes. 1 Clamps Clamps come in many different sizes and strengths. I use two sizes, one about 3 inches and the other about 6. They are invaluable for holding cards, fabric, cables, props and sometimes even clothing in position. I use them to hold up my background cloth on to a horizontal pole. I use them to position tiny reflectors on tables for shooting product. I even use one to hold a dark card over my monitor to keep glare off of the screen from the ceiling light. It's pretty ghetto, but much cheaper than a store-bought version. $8 vs $200. 2 Gels Specifically, lighting gels that are mounted on lights in order to change the light colour or quantity. They come in a myriad of different colours, and strength of colours. I bought a small pack that fits in a pocket, to mount on my speedlights this year. Amazing move on my part as it gives me more opportunity for creative results. I also have large sheets that I can mount on larger lights or even cut down with scissors to fit specific lights more precisely. If I want to control light without changing the colour, I can use neutral density filtering gels, or polarizing gels on the lights. The former reduces light reaching the subject, while the latter polarizes the light to help remove reflections from shiny surfaces. Specifically oil paintings. Used in conjunction with a circular polarizer on my lens, I have much needed control when photographing artwork. I would highly recommend learning about gels and grab a set for your lights, at least to experiment with. 3. Stands I have 5 stands that I use both here in studio, and while out in the big wild world. Since I only use speedlights currently, my stands are mostly light-weight stands that reach to about 6-7 feet. I will use the stands to hold lights as I said, and a background kit in addition to holding cards or reflectors. My biggest stand, which I grabbed this year, is a heavy-duty and fairly hefty beast that has a tilting extension arm. This give me the versatility to be able to put light up and over my subject when the need arises. This year I bought it to enable me to use a large softbox over top of motorcycles for a personal project I am involved with. I was lucky to be able to source this stand from an importer and saved almost 50% off of retail. The deals are out there if you take the time to look. 4. Gaffer Tape When you see the credits at the end of a movie, you may notice a job title that is "Gaffer". It's this person who is responsible for controlling a large amount of the grip equipment for the lights etc. They always have rolls and rolls of gaffer tape on their belts and in their vehicles. This tape is strong, sticky and really imperative for holding things when a clamp will not be suitable. The great part is that it doesn't leave a residue when being removed. It comes in different roll sizes and widths. I would suggest wrapping a few inches on your tripod leg just to have it available. It's great for controlling cables, positioning small objects on tables (mirrors, reflectors) and all sorts of other uses. The large rolls go for about $25 and will last at least a few years. Black is the standard as it doesn't reflect light, but blue and red come in handy too. 5. White and black card On more than one occasion I have had to use a 18x24" white card (foamcore) to bounce light into my scene as it gave a more flattering light than a straight flash. I even used this technique for the cover of a magazine shoot a while ago. Black cards are ideal for controlling light that is bouncing into your scene as they absorb light. They also can be great for blocking light from striking your lens and ruining the shot. In this case they are called a "flag". I've also used cards to change the light by cutting random pockets or shapes in then and shining light through them in order to give variety to my background when a dull background needed spicing up. So remember this, white cards bounce light and black ones block it. You can find them at Dollar stores, some office supply stores and they are really inexpensive. Buy a bunch. BONUS 6. Reflectors Reflectors do exactly as the name implies. They reflect light. These can be something simple such as a small white piece of paper, or a folding commercially made reflector that zips up into a pouch. In fact your hand can be a reflector, as can a white shirt or a small hand mirror. Ideally, a reflector is exactly what works for the job at hand. Small objects sometimes need tiny mirrors to achieve the goal, large objects, such as cars, obviously need large reflectors in order to bounce light in a useful way. Different colour of reflectors will give you different results. A purple reflector will produce a purple result on your subject. It's a fact that light takes on the colour of the object it hit. That's basically how we can perceive colour. If you wanted to show that a white egg is actually green, and you didn't have a green lighting gel, grab a green reflective card from the dollar store and shine a daylight balanced light on it. It will bounce onto the egg as a green light. You're welcome. These simple items are always getting used in my work. If you find value in this little bit of info, please consider sharing with your crew. Knowledge is power. Are polarizers just for landscape pictures?When I am out on a sunny day, shooting an interesting scene, I always have my polarizer and my ND (neutral density) filters packed in my kit.
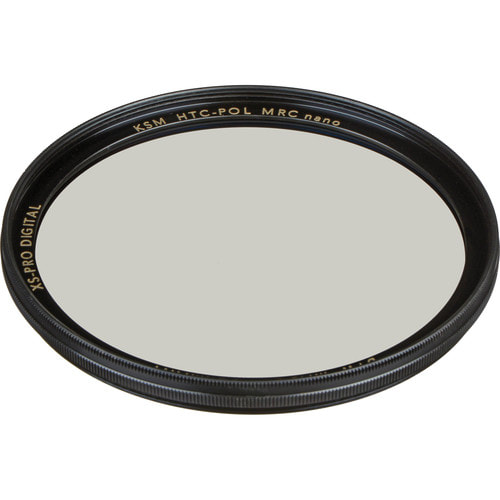
Having these small filters gives me the opportunity to reproduce the image of what I am seeing, so accurately for the viewers that they feel like they were with me too. Sure, much can be done in post-production, using the wonders of accurate modern software (just like one did in the darkroom), but for me, getting it perfect in camera is part of the process. It gives me the satisfaction that I've used the tools at hand to get a better image with minimal manipulation of those tiny little pixels. Shooting landscapes that include water, bright snow, a colour-rich sky, can all be made better and more intense by using your polarizer. There are many instructional videos, books and blog posts that cover the how-to of polarizer use. So finding the best information can be a bit daunting, and sometimes completely incorrect. Tread lightly and be sure to consult worthy resources. For example, the makers of polarizers, or scientific studies that deal with them is probably the best bet. After that, I would consult the words of seasoned photographers who routinely use them. Other than shooting landscapes, another great and sometimes essential use of these tools is when photographing paintings and other shiny artworks. The reason being is that some paintings, primarily oils, are finished with a varnish which preserves the paint and keeps the vitality of the colours strong and impressive. The varnish is highly reflective. This can be detrimental when trying to record the art using lights of any variety. Attaching a circular polarizer on the camera lens, and adding polarizing sheets on the lights, will reduce or remove completely the glare that lights produce as it skims off the shiny varnished surface. By turning the polarizer while previewing the image in the camera, the photographer can see the glare being reduced. It would be important also to note that polarizers will absorb a portion of the light, and may also alter the colour slightly. Accommodations will have to be made with respect to these conditions. In my work, I always use a Color Checker Passport to make sure my colour and exposure are accurate. Since each camera colour bias is unique, it is important to do this for each camera body you may use, and for each lighting condition. If you are shooting with LED lights, be sure to do a colour profile for your LED lights from month to month as bulbs change colour over time. The same goes for incandescent, fluorescent, flash etc. Each bulb has its own colour temperature. I would avoid mixing lights to photograph art because of this sort of thing. While these filters can be expensive, if you are using them repeatedly and take care of them, it would be a worthy investment as it will save you time in post-production. A circular filter should average about $80 depending on size, and the sheets for lighting run about $70 for a 17x20 inch sheet. If you are shooting with flash, this is much more than required. You could cut pieces of polarizing film to fit your flashes, and sell the remainder to make a profit. I'll leave that up to you though. At the end of the day, quality polarizers make for better pictures and saved time. Which do I change to get the desired effect on my image?
Well, that depends on your situation and what you are trying to do. First, let's look at what each of these changes actually do. Aperture. The aperture, or the opening in the lens through which the light travels from your scene to the light-sensitive surface (film or sensor) can be widened or narrowed using the dial indicated in the image above. In this case it is a Nikon D800 camera. By making the aperture (opening) wider, you are letting in more light from all sources. That includes flash units, sunshine, manmade lights etc. Alternatively, by making the aperture smaller, you are reducing the amount of light that reaches the sensor or film. Pretty simple. Now lets look at the Shutter speed. The shutter speed is essentially the length of time the shutter stays open once you press down on the shutter release button. It can be measured in fractions of a second, all the way to minutes and even hours depending on the situation and camera. Combining these two adjustments will determine how bright your subject will be and to a point, how bright the background will be. It can also determine if a moving subject is frozen still in the scene or if it appears blurry. Let's say for example that you are photographing a 3 year old child playing in the park, and that you want to freeze the action, keeping the facial features sharp and recognizable. By using a fairly open aperture you can keep the child in focus and blur the background. Something around f5.6-f8 would be a good starting point. Combine this with a shutter speed of around 1/250 second will give you an image that stops the moving child, making them the centre of attention. One caveat of this technique is that as the lens becomes longer, the depth of sharpness decreases. For example, if I use a 200mm lens at f5.6 my depth of sharpness (depth of field) will be less than if I use a 50mm lens. If I use a wide angle lens, such as 24mm at f5.6, the majority of my scene will be in focus. Keep this in mind when you choose a lens for shooting portraits. The best thing to do in deciding which lens to pick, is to practice before you need to. Are you shooting landscapes? Do you want all the scene to be in focus from near your location to the distant hills? In this case, a wide angle lens in combination with a small aperture will serve you well. For example, a 15 to 24mm lens could be perfect depending on the composition you are going for. Set that to f11 or so, and your depth of sharpness (depth of field) will be the greatest. When you start shooting at apertures in the area of f16 to f32, the lens may introduce distortion because of how light is diffracted through the tiny opening. This is a good time to do some testing in order to judge the ideal aperture for your situation. Using a flash to illuminate your subject? In cases such as these, your aperture is even more important. Read about what to do in these situations in the next blog post. Feel free to ask questions if you need to clear up anything that confuses you. I'm here to help. Youtube has a good number of videos illustrating the benefits of both speedlights and strobes. Enough to make your decision as easy as pie and clear as mud. I'm not going to bother making yet another video. That would probably only contribute to the murky and muddy waters. I'll let you decide what works best for your type of shooting and budget. What I will do here is help to divide the two types of lights even further apart, so as to assist you in clarifying which would be better for your particular situation. Here goes. Speedlights, or hotshoe flashes. Used on the camera body or off have a number of benefits. The first is that they are in general much smaller than a studio strobe. I would also venture to say that they are considerable less expensive, but not always. Another benefit is that they are flexible in that their small size allows them to be mounted, hidden, tucked away in interesting places in order to illuminate the scene as desired without too much trouble. For example I have taken to wrapping my SB900 with an industrial twist-tie and attaching it to a tree branch when required. Not easy to do with a studio strobe. Speedlights run on batteries, and therefore don't require a cord to be plugged into a wall outlet or generator. Speedlights have a plethora of accessories including colour gels, diffusors, light shapers, reflectors and more. They can easily be mounted on a low-weight light stand and coupled with a number of different light modifiers. They can be ganged together in infinite groups to create a wall or tree of light if necessary. All triggered by one trigger. If one fires, they all do. Just make sure you have enough batteries. I love my speedlights. I use both the Nikon SB600 and SB900 almost every time I shoot portraits or still-life images. Talking about the studio flash, or flashes that do not have a hotshoe mount, such the speedlights do means talking about larger lighting units that put out considerably more power than speedlights. In that circle we have brands such as Elinchrom, Profoto, Speedotron, Balcar, Bowens and others.
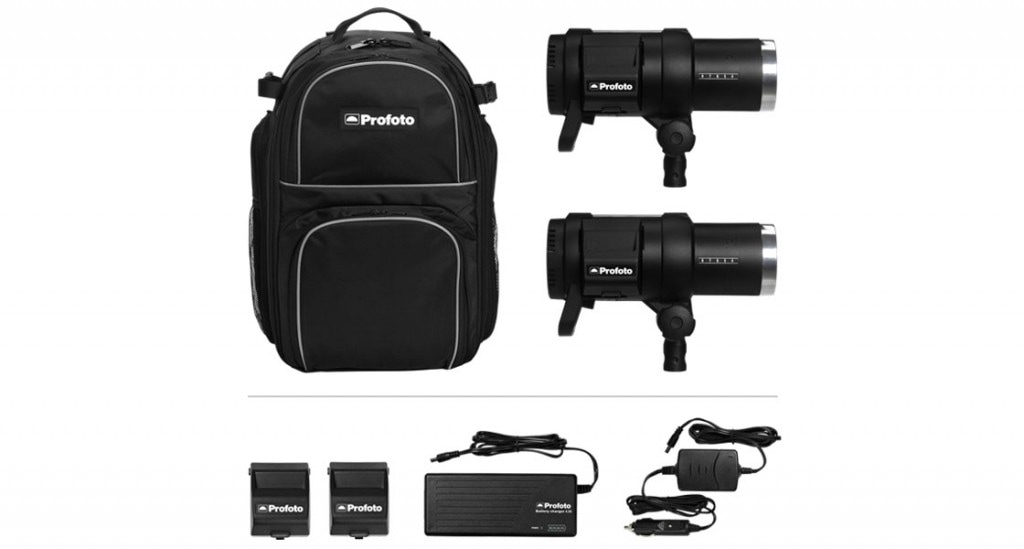
They do have a number of benefits to the studio and street photographer. Benefits such as: high power output, fast recycle time, some have modeling lights at more. Some models are strictly battery powered while others require a cable connected to a power source in order to operate. Profoto for example have two lines of flash, one of which is a self-contained battery powered flash unit and another that is AC powered. All of these lights have a huge variety of lighting accessories. Some brands less expensive than others. Most of these brands have long pedigrees, such as Elinchrom and Speedotron. I was a happy Speedotron user for a number of years, but I jumped off of that bandwagon when I came to the conclusion that the work I was doing didn't justify carrying the heavy power pack that always relied on a power outlet. In fact I think the catalyst was when on a shoot for a woodworking magazine, and the electricity went out for half the city. We had to reschedule. Needless to say, I quickly secured a couple speedlights for the next day's shoot, just in case. Studio lights have a lot going for them over speedlights. They also have a few draw backs. First and foremost, they are powerful. If you need to light a large group, studio lights are probably your best bet. They will cover the group with power to spare. On the negative side of the argument, they can be heavy and take up much more space. Not great if you have to travel any distance or carry your gear. They also tend to be rather pricey. Looking at a nice Profoto 2 light kit? Plan on spending between $2000 and $3500. Of course if you know that you will need that power, it might be worth the investment. Counter that with a simple 2 light speedlight kit at about $600 to $900, and you find yourself truly looking at your lighting needs very closely. When it comes down to lighting, it is a personal decision based on finances, intended use and the style of lighting. Weigh all of these factors together to come up with your ideal lighting kit. You might also keep in mind that rental houses are usually available to fill out that requirement in a pinch, but remember to keep your credit card usable. Get more stuff!
That's what this tiny person in my mind keeps telling me. This little guy is convinced that in order to be a better photographer, I need to have new newest and most amazing new Nikon lenses, DSLR bodies, filters, flashes or whatever the press is promoting. But then the sensible creature in me has the opinion that a basic camera kit, coupled with the ability to think creatively will be sufficient to get me through any photographic challenge I come across. Which one is right, and which voice should I listen to? Who's to say, but I do know that both voices have valid arguements. Yes, I like to put my hands on the latest and greatest that Nikon has to offer but in the same respect I have a few lenses from Nikon that are vintage from the early 1980's and perform flawlessly. There's really now reason to change them. It can be a difficult choice, especially for a person who appreciates tools for what they are. Tools. The means to an end; a great photo. Maybe you have the same problem in that you never know if it is a good idea to spend money on the new shiny bauble when last year' bauble is perfectly usable. Do you go get the new Nikon 750 while you still have a Nikon D7000? Maybe if you sell the D7000 it will justify upgrading to the D750? Pehaps if you decide you want to shoot night scenes now it will justify the need for the D750 and its increased ISO range. To justify or not. To spend the cash or not. Never an easy decision to be sure. I know that for myself that if can find more than 2 excellent reasons to make a new camera kit purchase, I will probably do it. I'll find the cash. I'll get it done, but not without a whole whack of research first. I read the reviews, do the comparisons, and if I can put my hands on that shiny new Nikon lens before completely convincing myself to buy then I will. I don't shoot sports so I don't need a camera that shoots 6 frames a second. I don't shoot water buffalo on the Serengeti so I don't need a 500 mm f4 lens. If I wanted to shoot those subjects, well more than likely the desire would be brief and I would simply go out and rent the needed equipment. A means to an end. Try to remember that. For the most part this stuff is simply a bunch of tools that are designed to get you to the end. That amazing photo. What will you NEED to get to your next amazing photo? |
Mike Taylor
Photo-Artist working a personal vision. Archives
July 2024
Categories
All
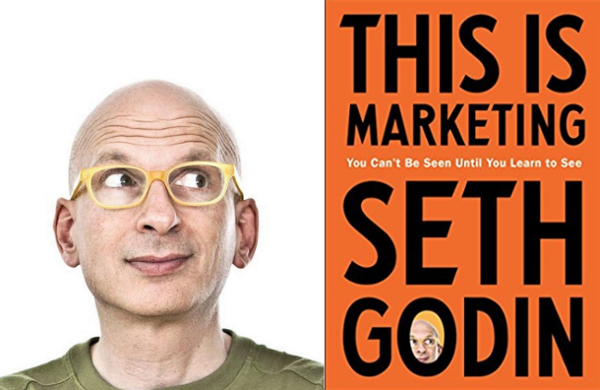
For those of us interested in better marketing techniques, get this book.
Mike Taylor Photo Arts
205Wilson Street
Peterborough
ON
K9J 1S7
Canada
|



 RSS Feed
