
 To say that being a photographer gives you access to people and situations that you normally wouldn't have is such an understatement. This holds true for people in cities and rural areas as well.
Of course it depends on what personal limits you apply to yourself and how curious you are. Me, I like to take on projects that I know will stretch my skills. Whether that means that I have to learn a new lighting technique or I will have to connect with a group of people who I never would have in the past, I am willing to make it happen in a quest to achieve my artistic goals. This past year I started a project photographing amazing motorcycles out on locations using big lighting and then connecting with some of the guys who are restoring these bikes to do portraits of them in their workshops. I seem to have adopted a particular lighting style. For the people portraits I'll usually douse the existing lighting and bringing 2 or 3 small flashes in order to mould the situation to my liking. It all depends on the situation and whether I have enough time to do what I want. Usually time is on my side. If you are considering taking on a project that will mean shooting portraits on location, I would advise that you practice using your equipment in made up scenarios before hand. Get comfortable with your equipment. Learn it's quirks and what it can and can't do. Find how your lighting compliments your style of shooting. It's important that you know exactly how it all works before you enter another person's space. Case in point; Bill Edgar in the image above, owns and restores amazing Triumph motorcycles. I learned about him while at a British vehicle gathering in Lindsay Ontario. I learned about the because I met another bike owner at a different vehicle gathering. 1+2+3= Bill. Speaking with Bill gave me the opportunity to photograph one of his bikes on location in Lindsay, and a brief conversation opened up the option to do a portrait of him a few months later. But it all started because I had an idea. Portraits on location afford you the opportunity to explore practically any subject you are interested in. It all starts with your curiosity and a drive to achieve your goals. The execution of your portrait project could involve any number of lights, locations, subjects, days or in fact years. Or maybe you want to dedicate a single day to shoot something around a special theme. Take your time to decide what your project will be and put all your energy into it. Nobody can tell you what to shoot. It's your project. Go forth and create. A quick lesson in how I use camera flash to improve people pictures. The first point of interest is "why" would I/you need to incorporate a flash for a portrait. The quick and short answer to that question is to improve a dull or uninteresting/uninspiring image. How you would do that depends completely on the situation you are presented with. It would be difficult to illustrate that in a blog post, as a video would be more appropriate. However, I will do my best to give the reader some sort of understanding as to my approach. Hypothetical situation (A) You and your subject are in a room with a chair near a big bright window. The sun is streaming in, illuminating part of your subject's face. Since it is strong and contrasty, the lit side of her/his face is quite bright, and subsequently the shadow side is very dark. The unlit parts of the room are dark and very moody, almost creepy. To lessen the creepy-factor, it would be wise to reduce the shadows as to bring up detail where there is none. (of course this is assuming you are not creating a scary portrait) The key here is that we want to reduce the depth of the shadows, not eliminate them completely. We need shadows to show shape and form afterall. First, shoot an image and look at your monitor. When you have the highlight side of the subject's face looking satisfactory, not too bright nor too dark, make note of your camera settings. You can either establish this using one of the camera's priority modes or in full manual. It doesn't really matter. What matters is that the bright, sun-lit side of the face is exposed well. Now use your flash, mounted to the camera if necessary. Preferably operated off-camera using a trigger, cord, or other firing method. Let's assume it will be on camera. Turn the flash on and set to manual. I would advise that you swivel the flash head towards the wall that is nearest the shadow side of the face. Set the power setting low. For example 1/16th power to start. Take a shot. Look at your monitor and see if the shadows have brightened up to the point where you can clearly see details in the shadows. Still too dark for your taste? Increase the power output by a ⅓ stop and shoot again. Keep doing this until the shadows are acceptable to you. You could also do this with the flash in TTL mode. I would however, use the flash output compensation mode in this case as you test things. Have it set to a negative value and slowly increase it in order to achieve the shadow value you desire. Again, bouncing the flash off of the wall nearest the shadow side of the subject's face. Keep doing this until you get the image you desire. 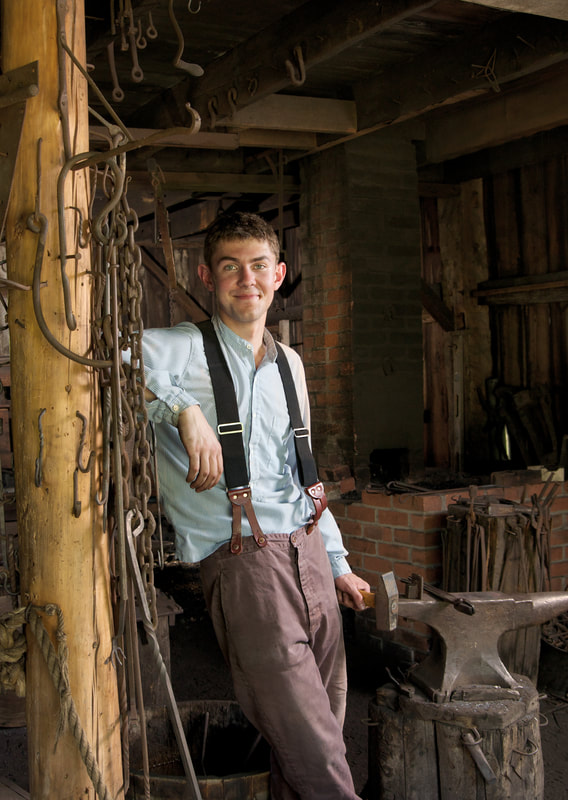 Situation (B), outdoors in bright sun. In the next situation, you might be outdoors on a sunny day with deep shadows present all around. I would use my flash off-camera if at all possible in order to put details in the shadows of a person's face and to add a bit of life to deep eyes. Getting the camera off of camera is ideal, however if you can swivel the flash head in order to bounce the light off of a lightly coloured wall, shirt, vehicle etc. that will work as well. The key is to fill in deep shadows in order to bring out the details. If you are prepared or otherwise have an assistant who can carry equipment, you can incorporate a light modifier of some sort in order to make this work even better. Exposing for the brighter part of the face comes first. This can be achieved using manual mode just as easily as shooting with your camera in TTL mode. Test it and see. If your subject has similar skin tone as yourself, hold your hand up into the same light situation as them, and photograph your hand without the flash incorporated. When the skin tones look correct, note your camera settings. Now get your flash going and adjust the settings of the flash in order to give you a gentle bit of fill on the shadow side. If the sun is coming from the left in this example, also have your flash coming from the left. This will reduce the chance of creating weird shadows on the face. Play and see what looks best to your eye. Practice and practice again. Don't be afraid of flash. It won't hurt you or your subject. 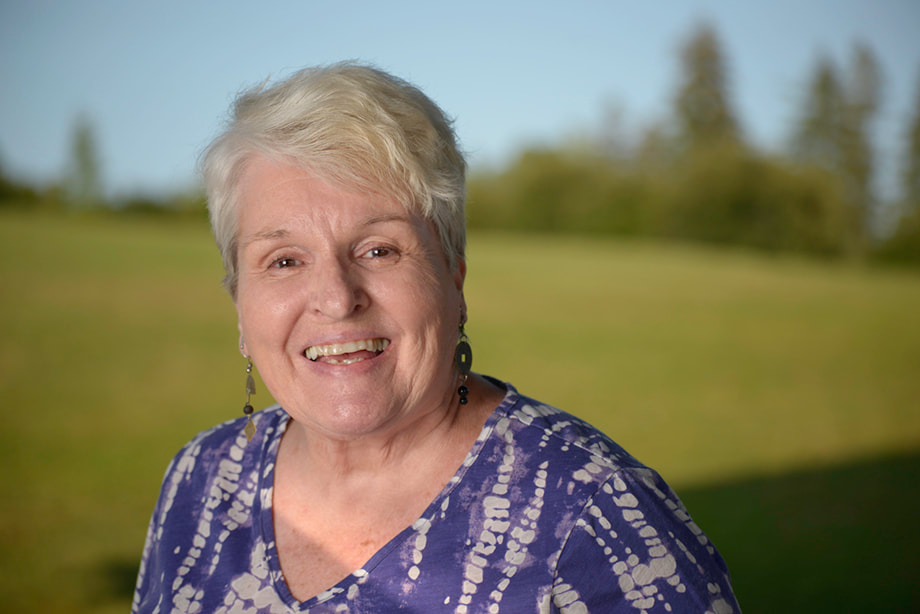 Short and sweet. I've been re-reading the books of Seth Godin lately and have found a few lines that truly speak to me about where I am now and where I want to be. I have a feeling that they may speak to a few of you as well. "It's tempting to make a boring product or service for everyone. ....The problem is that the marketplace of people who are happy with boring is static. They aren't looking for better." "New and boring don't easily coexist, and so the people who are happy with boring aren't looking for you" This from his book, "This is Marketing" If you are tired of the same old thing in your life, you might want to go pick up this book. Be prepared to take a million notes and prepare to change your life for the better. You're welcome. 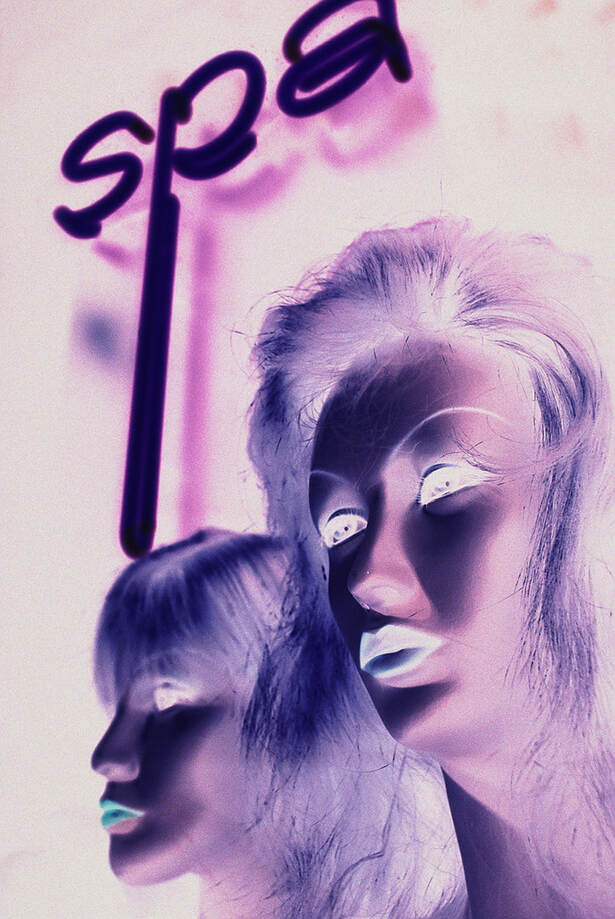
This article illustrates 4 key points for why you should be using a Wacom tablet in your photography work. * Improved workflow * More precise adjustments * Faster processing of images * More ergonomic interface, reduction of mouse-related problems Improved workflow Any photographer interested in keeping their processes moving along in an efficient manner, should be considering adopting the use of a Wacom or other branded tablet as their primary user interface. Having the ability to fully customize a wide variety of features to each and every application, not just Photoshop or Lightroom, gives the user so much more ability to get the job done quickly and with less stress. Sure there is a learning curve with this new equipment, but that is the case with every new camera body, flash, computer etc. Once the user has decided on the most effective settings and gone through them a few times, they will be wondering why they hadn’t switched much earlier. Having used a mouse and keyboard since the dawn of time, I was amazed at how much faster I can go through a batch of images with a tablet and stylus. I can accomplish complex tasks faster and more precisely. This means I make fewer mistakes. Mistakes that necessitate me undoing my work and having to start over. On a side note, even if I am working in a different sort of software that has nothing to do with image manipulation, I still find myself picking up the stylus instead of the mouse. It’s just that much more agreeable to my frame of mind. It makes want to use it. More precise adjustments Having the ability to adjust not only things such as brush sizes on the fly but also, brush pressures, angles, tonalities and so much more is such a blessing. I personally, find that these adjustments are now so quick that I rarely use the keyboard except for those times when I need to enter information. With two buttons on the stylus that can be programmed to take on a number of responsibilities in addition to the plethora of settings on the tablet buttons and radial menu, the ability to precisely affect the images becomes a pleasure and not an annoying task. When I used the mouse I found that I needed to move the mouse in a way that seemed rather clumsy. Metaphorically, it’s almost like reverting to using candles to heat a room instead of pressing a button on the thermostat. Having learned to write with a pencil at an early age, like most people, using the stylus/tablet combination is like picking up that pencil again. It’s familiar, comfortable, ultimately usable. The fine control available when using the Wacom with its stylus will make you more of an artist than a technician. Faster processing of images From start to finish the fact that the user can work in a more intuitive manner alone speeds up the processing. Instead of an operation requiring 3 or 5 steps, it may only require 1 step. This means that things like resizing images for export, copying and creating multiple layer copies etc. can be done in a third of the time that it used to. Used in conjunction with the Actions feature in Photoshop, for example, a user can get things done so much quicker than in the past. We are truly living in an amazing time, to quote photographer Joel Grimes. There are countless videos online that give you instruction on how to speed up your workflow using a tablet. I would recommend that any new user look for a few videos, but ultimately you won't become used to the tools unless you practice using them. More ergonomic interface, reduction of mouse-related problems Using a pen-like interface for most people is a more intuitive approach to working with files. Yes, using a mouse has become the “norm” for computer interfacing over the last 30 years or so, and touch screen technology is quickly overtaking, but there is something rather artist-like when one uses a precise tool such as a well-balanced stylus and tablet to do the job. Holding the stylus as you would a fine pen, with access to the programmable buttons, you feel well connected to the image on the monitor. The hand can move freely. The wrist is not fixed in a position that invites discomfort with repeated use. Repetitive strain injuries are also significantly reduced. This combined with the variety of available stylus tips, and surfaces for the Wacom product line, you are able to truly work like an artist would on paper or other media. A Danish study of some 3500 Danish workers revealed that using a mouse in their daily work, increased their chances of pain and strain by a factor of 4, even if they only used the mouse for half of the computer time. Another study, again by Danish scientists, revealed that workers using a mouse in their jobs for more than 30 hours per week had up to 8 times greater chance of developing forearm pain, and double the risk of neck pain. Shoulder pain also increased significantly as a result of continued usage. The Wacom line of tablets, for example come in a variety of iterations. There are the basic versions for a relatively small investment all the way up to the Cintiq line designed for production studios that will set you back a pretty penny. Available through camera shops, online at various suppliers and of course there is the used equipment market of which I'm a huge fan. Whichever way you go, it's best to do a lot of research beforehand. I would not recommend purchasing equipment that is designed for travel if you are never going to do location work, nor would I suggest buying a large tablet if you have a tiny work desk. Look at your situation and your style of work then find out what is available to fit your needs and budget. Ranging from around $90 to well over $2400, there is a tablet that will work for you. That's it for me, the next step is yours.
If you are like me, you use Instagram to share the joy of your work. One thing that was bugging me, and may be bugging you too, is not knowing how to get my images to fit the Instagram format.
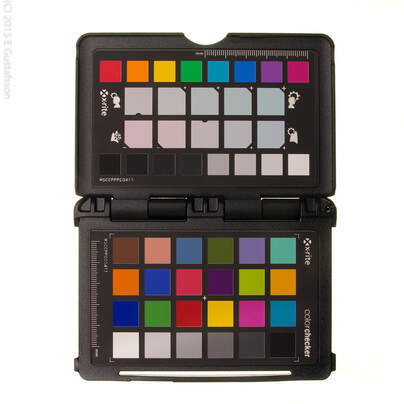
This video sorts that out once and for all. Hope this helps you too. Show your product as it really is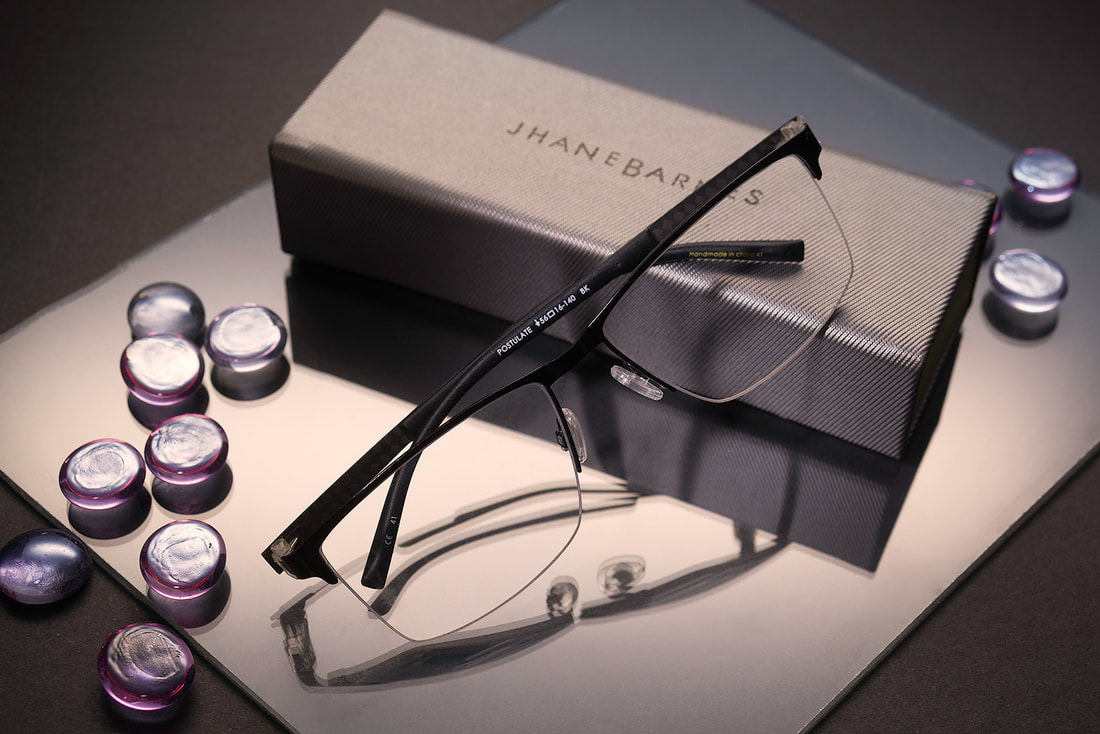  photo: Shawn Harquail photo: Shawn Harquail While sales catalogues have all gone online, that's both good and bad. Good, because you can reach people who in the past would never have heard of your product or known you exist because they hadn't received your printed catalogue. Bad, because you can not be held responsible for the quality of the image they are looking at once online. The problem here is that each monitor or screen a person views your product on, may display your product as being a different colour or hue. This could backfire when the client puts the product in their hands. We unfortunately can't control that, but what we can control is the production of the images at the outset. Here is how you can do that. Lighting The first important control is how we light our product. Since light has a different colour depending on the type, and to a point, the age of the light source, using the best lighting is essential for a successful product photography setup. Shooting products that are rich in colour and texture requires lighting that is daylight balanced at about 5500 degrees Kelvin. These are available as simple LED bulbs which are then diffused through a white paper, silk, bedsheet (pure white) or photography umbrella. Avoid trying to bypass this accuracy by using a cloudy day, because as the sun moves across the sky and indeed as the seasons change, the colour of the light changes. This in effect changes the colour of the product you are photographing. What we are going for is a consistent lighting arrangement. I would suggest purchasing a 3 to 4 foot long LED box light and mounting it to a light stand or a pair of LED lights in circular reflectors mounted to a stand. [see resources below] This will give you a portable lighting solution that is predictable and easy to use at a moment's notice. Situate your lighting so that it is about 5 feet from your subject and 45 degrees from it. [see diagram] What we are going for is a soft light to spread over the subject, not a high-contrast beam aimed directly at it. A large source of light (in relation to the subject) is the perfect solution. However, trial and error are advised because of all the variables at play in any given situation. Once you find the setup that makes your product look great consistently, record the positions and settings. Background Keeping the viewer's attention on the product is essential. What you put your product on or in front of plays a big part. Ideally, a white background, such as a large sheet of white paper, a pure white wall or something similar is what we want. Rolls of white seamless paper can be bought from photography suppliers. [see resources below] In order to achieve consistency here, you may need to light the background separately. Alternatively, if you have a powerful enough light setup, you may not need to. To avoid harsh shadows on the background, do not place the product directly against it. Experimenting with distances starting at about 3 feet is a good idea. If you have a white wall, start there. If you are selling wedding gowns for example, look for a complimentary background. Coloured seamless paper is readily available too. Camera Setting your camera up on a sturdy tripod may be necessary to allow for longer exposure times if you are using LED lights. It's not as crucial if you are using flash. Ideally, you will have a camera lens that has an adjustable view angle. Something around 50mm is great. Any wider than that and you risk distorting the product. If you are shooting with LED bulbs, your exposure time will likely be around ½ second. This is why the tripod is required. At first, set your ISO to a low number. Let's say between 100 and 400 ISO. The white balance should be around 5500 degrees, or daylight. Aperture around f6.3 to f8. Don't use a wide aperture (f1.4 to f4) if you can avoid it because it will limit your depth of field (focus) to a minimum and that may make your product appear out of focus. Avoid a tiny aperture, (around f22) as this will require much longer exposure times and risk colour shifts and blurred images. Assuming that you are shooting for the web, have your camera's image quality set at jpg/jpeg, and "fine". This will provide high enough quality, but moderately sized files. What we are going for are files that look great on a monitor of almost any size when enlarged, and load quickly. Some people are guilty of uploading images that look great at 2 inches tall, but look horribly pixelated enlarged. Not good for sales. The diagram below gives you an idea of a good starting point for locating your product in front of the appropriate background, and the lighting in relation to it. In this case, the "diffusion" is a white piece of fabric (pure white), but it can also be a bed sheet or a photography umbrella. Keep in mind that light takes on the colour of whatever surface it hits or passes through. 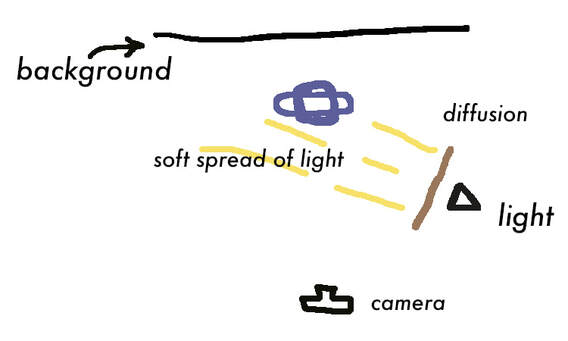
Wrap up
With this information, and some practice, you can accurately create images of your products quickly and with good lighting and colour. People who visit your site will be assured that what they put in their hands is exactly what they previewed. Please contact me if you have any further questions or suggestions. Resources For those of us in the Peterborough area, you can find a great selection of daylight balanced LED lighting at Jenco, on George street across from Del Crary park. A huge variety of photography equipment can be sourced from Henrys in Oshawa/Toronto, or Vistek in Toronto or Ottawa. A great portable white background solution is by Westcott. 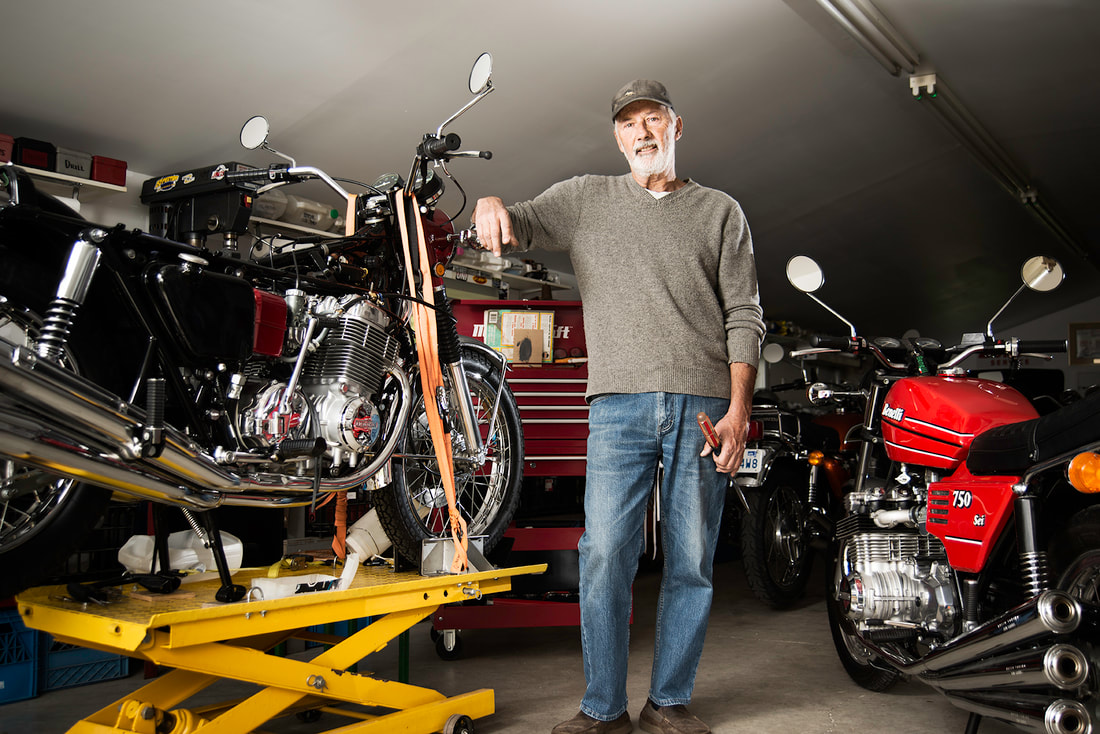 I think that it makes complete sense that an editorial piece, whether online, in a newspaper or other media, comes with images of the subject of the piece.
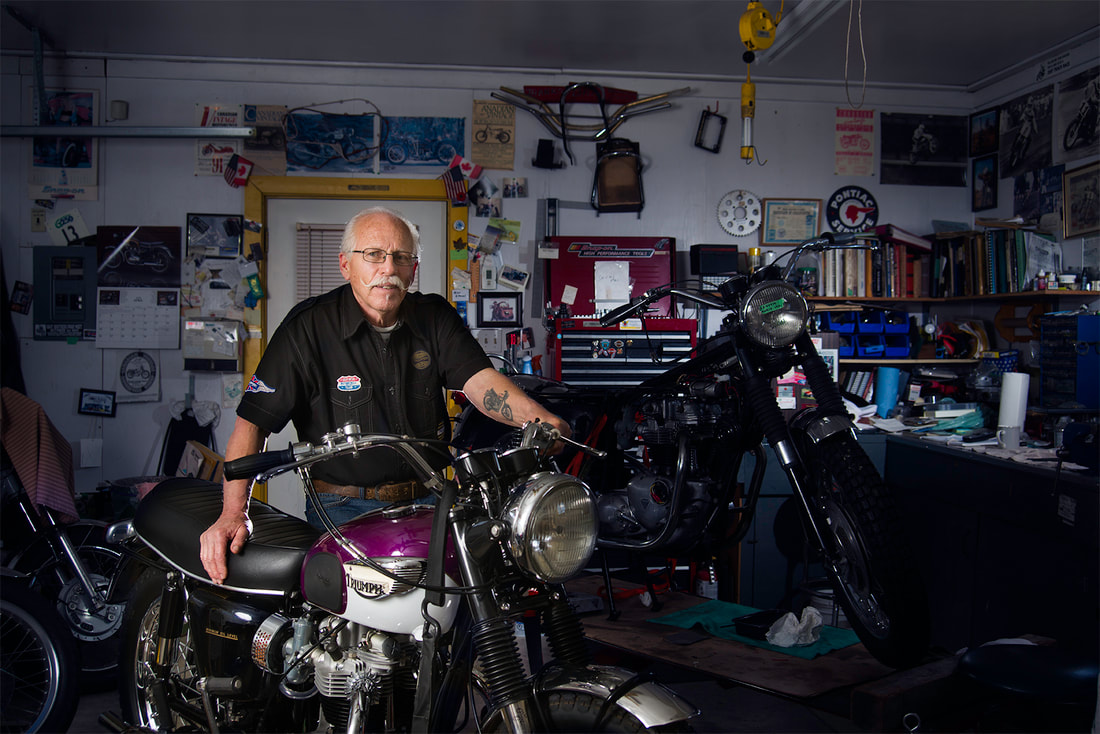
Thinking of magazines such as Life, National Geographic and others, it seems natural to have a portrait alongside the text. How one goes about gathering those images differs from one photographer to the next. I'm not talking about the trash mags at the checkout line. Those are basically sensationalism in my opinion and not really environmental portraits. This image of John, who kindly took part in my motorcycle portrait project volunteered his time so I could make a few portraits of him in his shop. Each bike is a classic and lovingly and intelligently restored and maintained by him personally. Having already made images of 3 of his bikes, I knew it was a natural progression to shoot images of him. Doing so gives the viewer a more in-depth look at his environment and helps to give a more complete understanding of his story. I learned about John in the process, just through casual conversation and being interested. This is my approach to creating successful environmental images. I'm curious. His interest in bikes lead to my interest in making cool images. I could go even further with this project and shoot some detailed table-top images of his tools, bike parts, dirty rags and all that sort of thing. It's all part of being in a creative zone which is never-ending. One image leads to another. It's a natural progression. From here, I simply allow the energy from this shoot and the conversations with John to lead my next move. In fact, having met John, I have connected with another classic-bike fanatic whom I will be make a portrait of in the spring. Bill, labels himself as a Triumph restoration expert. He is a well of knowledge about these machines. His conversation reveals how connected he is to the brand. Any question regarding this part or that function etc. will undoubtedly produce a spirited response and perhaps even a story from his younger days as he ventured to this far-off place or that. Argentina springs to mind. (it's a long story) Bill Edgar is a lover of old bikes that have character. I met him at a classic vehicle round-up in Lang over the summer, and after that I met him again in Lindsay at a British car/bike gathering. He loves talking bikes. Especially his 1947 Indian Chief in orange. I was scheduled to photograph his bike at the outset of this project, but low and behold on the very morning of the shoot, his bike would not start. Now we have re-scheduled the shoot for the new year, hopefully at the same location I had planned. It's because of Bill that I met John and because of John that I met Bill. It's these connections that can make a tiny project blossom into something quite substantial and impressive. Next year I will probably post images of the project and I'm quite sure I will have more short stories to convey as well.  Okay, I know, I know... you've probably heard all about these things in the past. Or you've watched any number of videos by photogs with their favourite things that they use every day and suggest that you need them too.
My list is the same, but different. Every item in my list gets used each and every time I shoot, whether in studio or on location. Some get used when photographing people and when shooting table-top or other still-life items. They are just that important. I'll post the details here and let you decide what appeals to you. Hopefully you get some value here, and maybe, just maybe, your life will be 1 to 3% more rewarding because of it. Okay, so here goes. 1 Clamps Clamps come in many different sizes and strengths. I use two sizes, one about 3 inches and the other about 6. They are invaluable for holding cards, fabric, cables, props and sometimes even clothing in position. I use them to hold up my background cloth on to a horizontal pole. I use them to position tiny reflectors on tables for shooting product. I even use one to hold a dark card over my monitor to keep glare off of the screen from the ceiling light. It's pretty ghetto, but much cheaper than a store-bought version. $8 vs $200. 2 Gels Specifically, lighting gels that are mounted on lights in order to change the light colour or quantity. They come in a myriad of different colours, and strength of colours. I bought a small pack that fits in a pocket, to mount on my speedlights this year. Amazing move on my part as it gives me more opportunity for creative results. I also have large sheets that I can mount on larger lights or even cut down with scissors to fit specific lights more precisely. If I want to control light without changing the colour, I can use neutral density filtering gels, or polarizing gels on the lights. The former reduces light reaching the subject, while the latter polarizes the light to help remove reflections from shiny surfaces. Specifically oil paintings. Used in conjunction with a circular polarizer on my lens, I have much needed control when photographing artwork. I would highly recommend learning about gels and grab a set for your lights, at least to experiment with. 3. Stands I have 5 stands that I use both here in studio, and while out in the big wild world. Since I only use speedlights currently, my stands are mostly light-weight stands that reach to about 6-7 feet. I will use the stands to hold lights as I said, and a background kit in addition to holding cards or reflectors. My biggest stand, which I grabbed this year, is a heavy-duty and fairly hefty beast that has a tilting extension arm. This give me the versatility to be able to put light up and over my subject when the need arises. This year I bought it to enable me to use a large softbox over top of motorcycles for a personal project I am involved with. I was lucky to be able to source this stand from an importer and saved almost 50% off of retail. The deals are out there if you take the time to look. 4. Gaffer Tape When you see the credits at the end of a movie, you may notice a job title that is "Gaffer". It's this person who is responsible for controlling a large amount of the grip equipment for the lights etc. They always have rolls and rolls of gaffer tape on their belts and in their vehicles. This tape is strong, sticky and really imperative for holding things when a clamp will not be suitable. The great part is that it doesn't leave a residue when being removed. It comes in different roll sizes and widths. I would suggest wrapping a few inches on your tripod leg just to have it available. It's great for controlling cables, positioning small objects on tables (mirrors, reflectors) and all sorts of other uses. The large rolls go for about $25 and will last at least a few years. Black is the standard as it doesn't reflect light, but blue and red come in handy too. 5. White and black card On more than one occasion I have had to use a 18x24" white card (foamcore) to bounce light into my scene as it gave a more flattering light than a straight flash. I even used this technique for the cover of a magazine shoot a while ago. Black cards are ideal for controlling light that is bouncing into your scene as they absorb light. They also can be great for blocking light from striking your lens and ruining the shot. In this case they are called a "flag". I've also used cards to change the light by cutting random pockets or shapes in then and shining light through them in order to give variety to my background when a dull background needed spicing up. So remember this, white cards bounce light and black ones block it. You can find them at Dollar stores, some office supply stores and they are really inexpensive. Buy a bunch. BONUS 6. Reflectors Reflectors do exactly as the name implies. They reflect light. These can be something simple such as a small white piece of paper, or a folding commercially made reflector that zips up into a pouch. In fact your hand can be a reflector, as can a white shirt or a small hand mirror. Ideally, a reflector is exactly what works for the job at hand. Small objects sometimes need tiny mirrors to achieve the goal, large objects, such as cars, obviously need large reflectors in order to bounce light in a useful way. Different colour of reflectors will give you different results. A purple reflector will produce a purple result on your subject. It's a fact that light takes on the colour of the object it hit. That's basically how we can perceive colour. If you wanted to show that a white egg is actually green, and you didn't have a green lighting gel, grab a green reflective card from the dollar store and shine a daylight balanced light on it. It will bounce onto the egg as a green light. You're welcome. These simple items are always getting used in my work. If you find value in this little bit of info, please consider sharing with your crew. Knowledge is power. 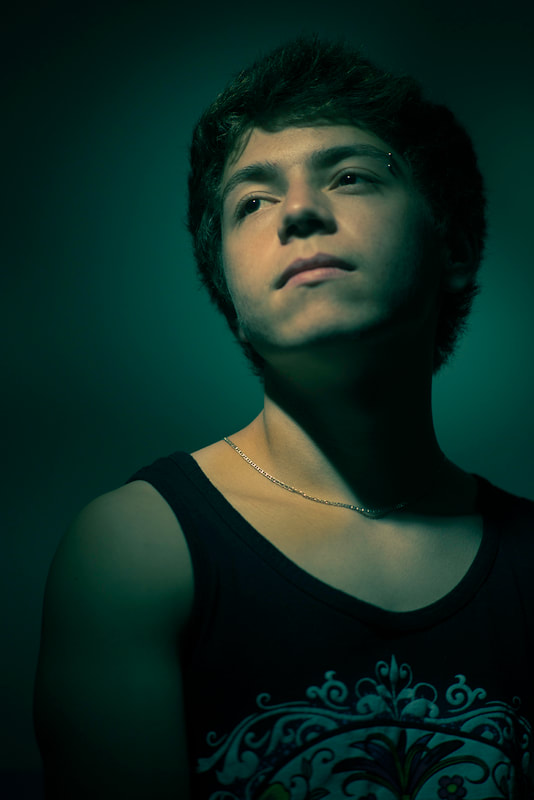 Nico poses in my home studio Having a comfortable and functional home studio can give you a leg up as a creative who needs space but can't justify spending money on rent. Some of us are lucky enough to have an extra room in our home in which we could set up, even temporarily, a set of lights and a backgrounds stand. It doesn't have to be that big. In my case I work in a space which is no bigger than 6 by 10 feet. In this space I can photograph a single person quite comfortably and even set up a table for shooting small product and artwork. Both of which I have done. Okay, so let's say you don't have an extra room. Do you have a room in which you could shove furniture aside and make presentable for a couple of hours of shooting? Even if it means dragging a Laz-y-Boy out of the way and hiding the kids toys? When you need the room to get your pics done, you'll find a way. What I'm saying is that if you have any sort of clean space in which you can set up your equipment, that is the perfect space. Make it happen. The best thing about it is that it is free and you don't have to travel to do it. A word of advice, make sure that your subject has a private and clean space in which they can change clothes. Whether that is a spotless washroom, tidy bedroom or amazing walk-in closet. It doesn't matter, as long as it continues the image of clean and respectable and gives them absolute privacy. That's all that really matters. You could go a step further and point out the extra hangers for their clothes, the unopened bottle of sparkling water, clean tissues, amazing makeup mirror (and lighting), clothing steamer (for wrinkles) and that sort of thing. All of these little extras can make your client/model feel all the more respected and valued. Expressing value is important when it comes to your brand and being able to charge decent rates for your work. 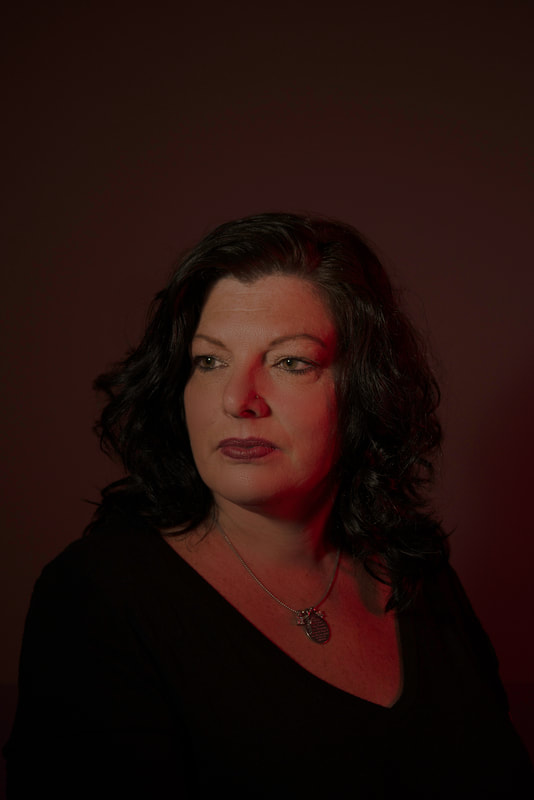 Kim poses precisely for my camera. 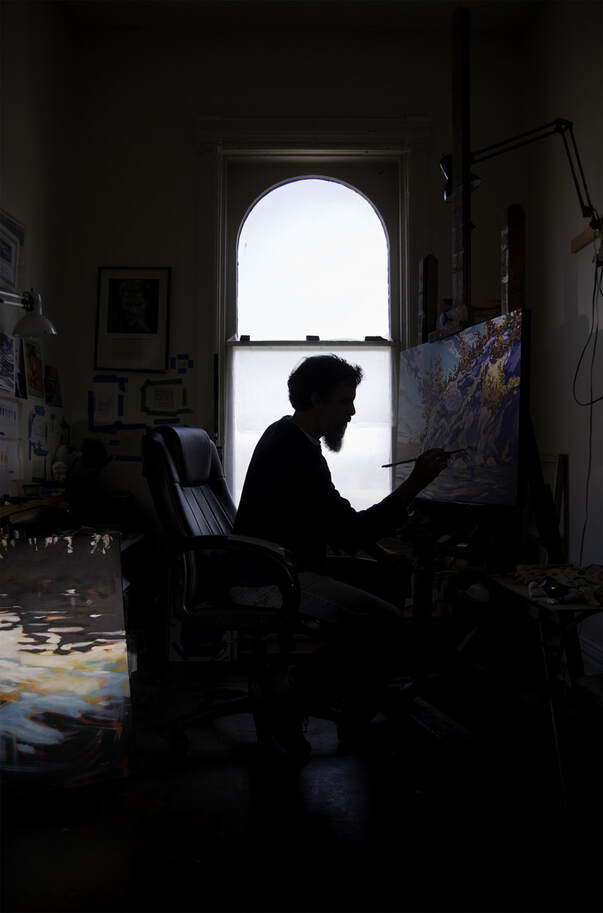 Portrait photography lighting, in its essence could be deemed successful if the person was shot completely in silhouette. Case in point, the portrait above of local painter, Paul Nabuurs was shot against a large window. No light illuminated him, but two flashes picked out features of his paintings. The window light backlit him, and helped to define his shape People who know Paul, recognize him for his head shape and more specifically for his beard. (he has since moved into a much larger studio space) 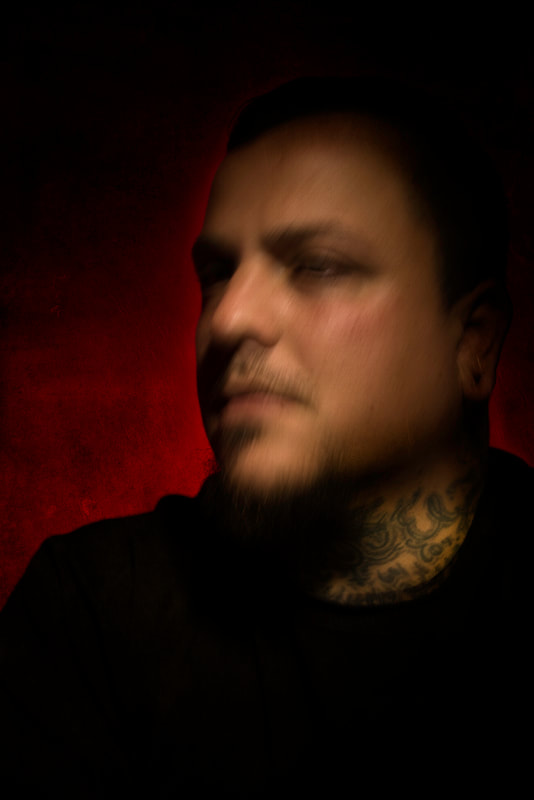 Lighting techniques for illuminating a person, are so varied that entire books have been penned regarding them. Suffice it to say that you could try a different technique every week for your entire career and get a different result every time. I for one am enamoured with the use of LED lights and motion as a way to bring about the feeling of spirit, energy, life. This image of Bruce in my tiny studio incorporates just that technique. We tried different types and speeds of motion with a second light (small flash) to pick out his neck tattoo each time. You will notice that even though his facial features are somewhat blurred, his tatt is relatively sharp. This is the action of the low-output flash with a tight cone mounted on it. I use this technique quite often in my experimental work as I find it helps me express myself and my approach to recording people as they truly are. Living beings, not statues. 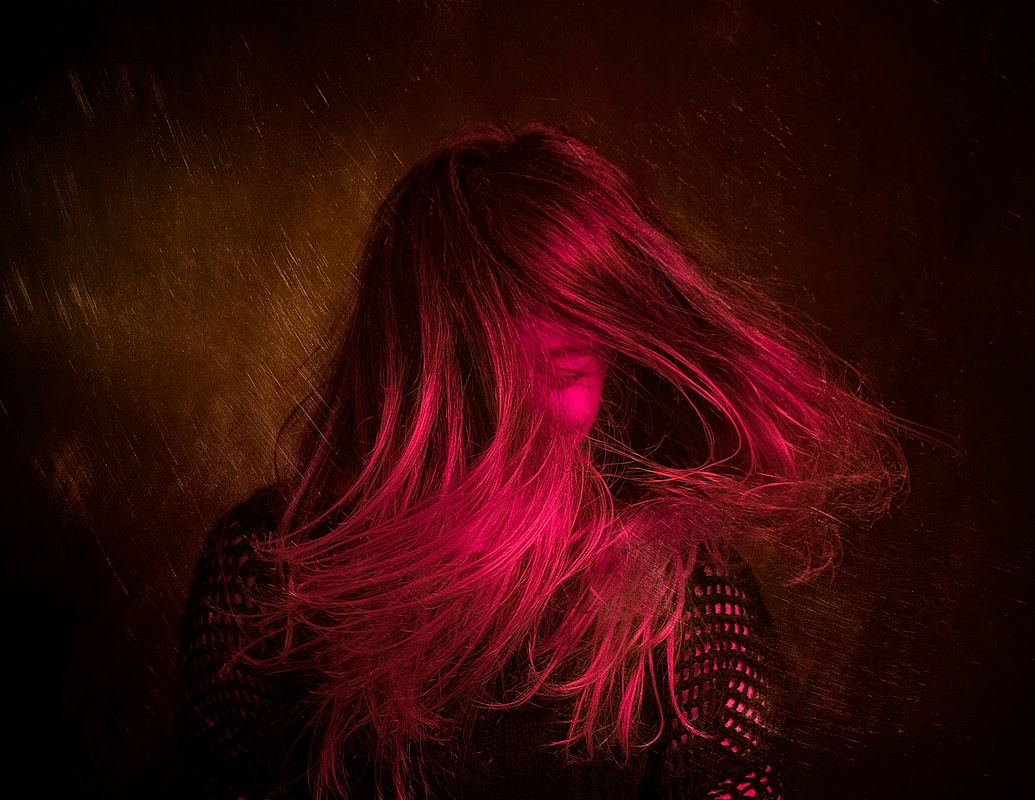 Further to that, being able to express that fact that my subjects are usually living (I hope), I sometimes feel the need to have them move during the exposure. Here, Samara humours me by rapidly flipping her head right to left and back again. A single flash hits the b/g while another flash with a purple gel shoots through an umbrella. Even more, I am holding an LED bulb over camera that is tinted with a mustard coloured gel. The resulting colour mix is beautiful, as you can see. The long exposure of 1/5th second gives me a bit of blur, while the flash freezes some of the image.
Experimenting with lighting is my way of metaphorically adding a new spice to the stew. Giving up and shooting like everybody else, is simply not an option. I encourage you to try it as well. Send me a note and I'll share my list of resources for gels and lights. |
Mike Taylor
Photo-Artist working a personal vision. Archives
April 2024
Categories
All
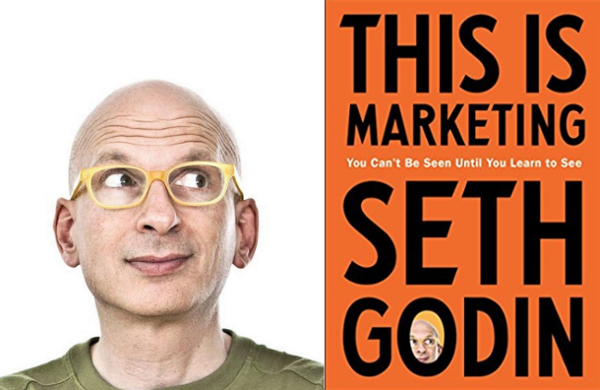
For those of us interested in better marketing techniques, get this book.
Mike Taylor Photo Arts
205Wilson Street
Peterborough
ON
K9J 1S7
Canada
|
 RSS Feed
